
Apple switched to the HEIC file format on iPhones and iPads to allow for high-quality photos with smaller file sizes than typical JPG images. However, not all devices or platforms support the HEIC format, leading to compatibility issues. Fortunately, converting HEIC photos to JPG is pretty straightforward.
In this detailed guide, I’ll explain what HEIC format is and how you can convert HEIC to JPG on iPhone, Mac, and Windows PC.
- What is HEIC format?
- How to convert HEIC to JPG on iPhone or iPad
- How to convert HEIC to JPG on Mac
- How to convert HEIC to JPG on Windows 11
What is HEIC format?
HEIC stands for High Efficiency Image Container, a file format adopted by Apple for storing images and image sequences. The format is known for its high compression efficiency, which allows captured photos to have smaller file sizes without any reduction in image quality.
With iOS 11, Apple introduced HEIC as the default file format for photos clicked with the iPhone or iPad camera. This allows users to store more number of images in the limited free storage space they get.
While this new file format has its benefits, JPG or JPEG (interchangeable file extensions) continues to be the universal standard. So, if you were wondering how you can convert HEIC photos to JPG, here’s all you need to do:
How to convert HEIC to JPG on iPhone or iPad
- Open the Photos app → Go to Library → Select the photos you want to convert.
- Next, tap the Share button at the bottom left → Choose Copy Photo(s) from the pop-up menu.
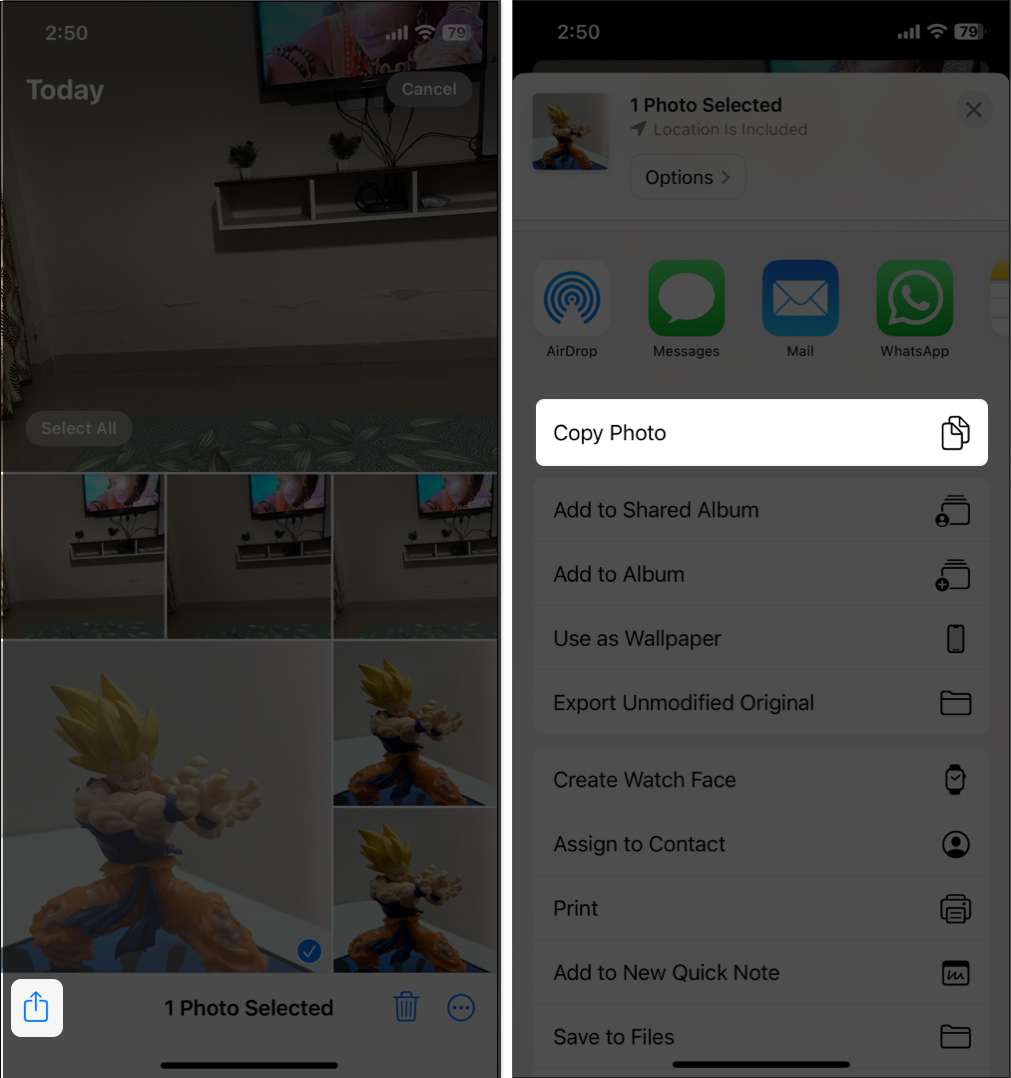
- Then close the Photos app and launch the Files app.
- Here, create a New Folder or head to an existing folder.
- Long press any empty space in the folder until a pop-up menu appears.
- Finally, tap Paste in the pop-up menu.

As soon as you hit Paste, all the HEIC photos you copied will automatically convert to JPEG and be available in the Files app.
While converting HEIC photos to JPEG on iPhone is fairly easy, selecting and copy-pasting each photo can sometimes get overwhelming. In that case, you can head to the Camera app settings and change the format in which the Camera app captures the shots.
How to take JPEG photos on iPhone instead of HEIC
- Open the Settings app → Head to Camera settings.
- Next, locate and tap on Formats.
- Select Most Compatible from the available options.
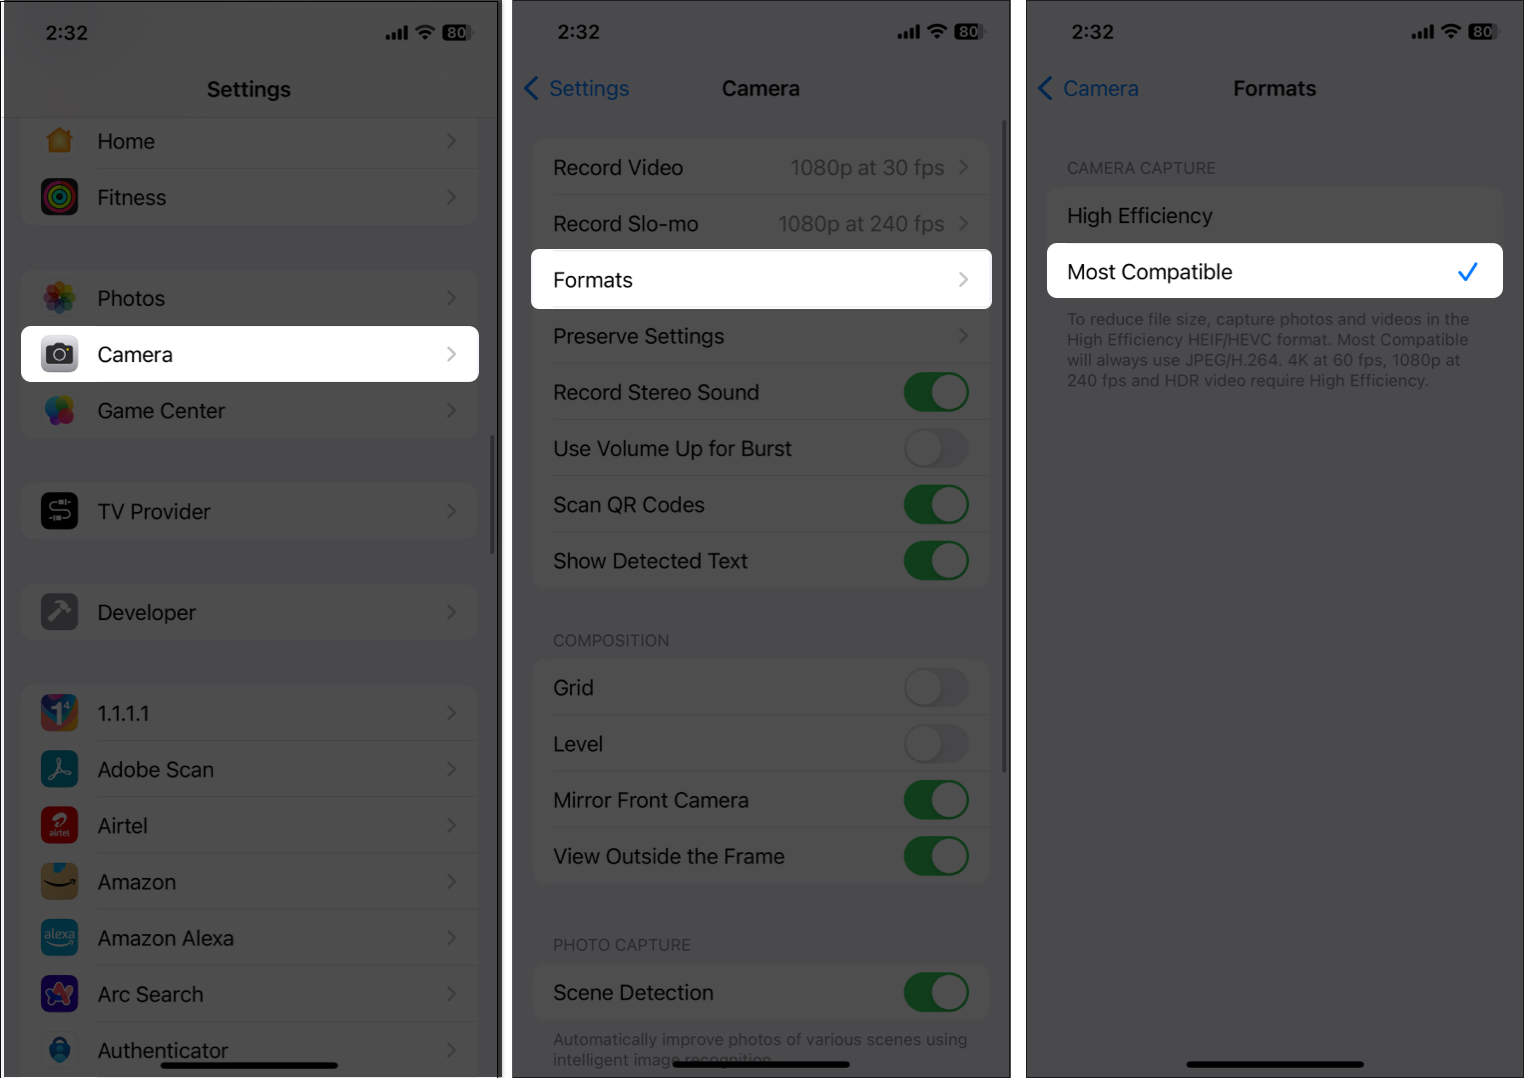
Now, every time you capture an image using your iPhone’s Camera app, the resulting photo will be in JPEG format.
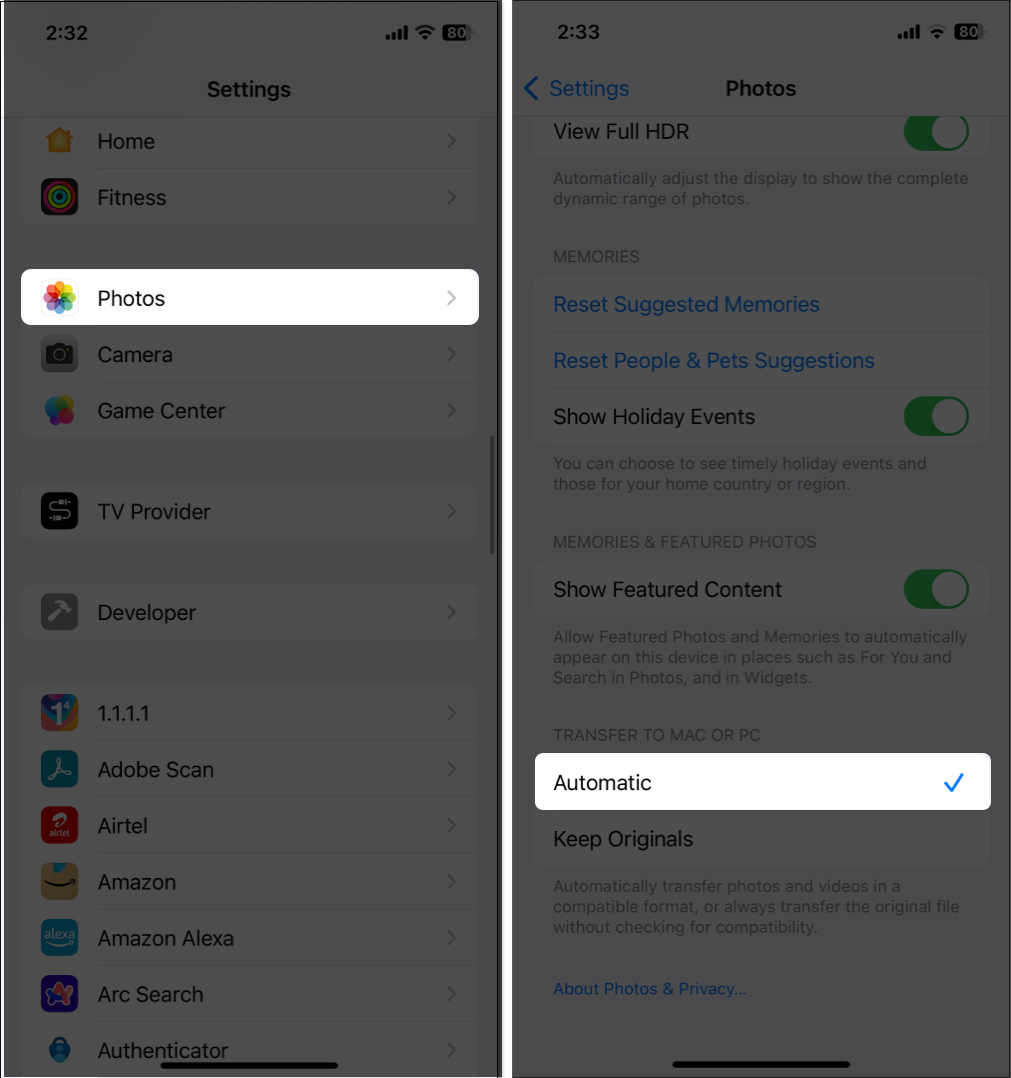
Automatically convert HEIC photos to JPEG while transferring to Mac
When you select Most Compatible as the format on iPhone, the size of the images clicked will increase.
If you are not in favor of this storage issue, instead of changing the iPhone’s image format, you can set the HEIC photos to automatically convert to JPEG when exported to a Mac or Windows PC. To do this:
- Open Settings → Navigate to Photos settings.
- Next, scroll down to the bottom and select Automatic under the Transfer to Mac or PC section.
How to convert HEIC to JPG on Mac
Selecting the Automatic format in Photos settings will apply to all the images you transfer to your Mac or PC from here on.
However, you still need to convert the HEIC photos already saved on your Mac manually.
- Launch Finder on your Mac.
- Select the photos you want to change the file format of and control-click on the selection.
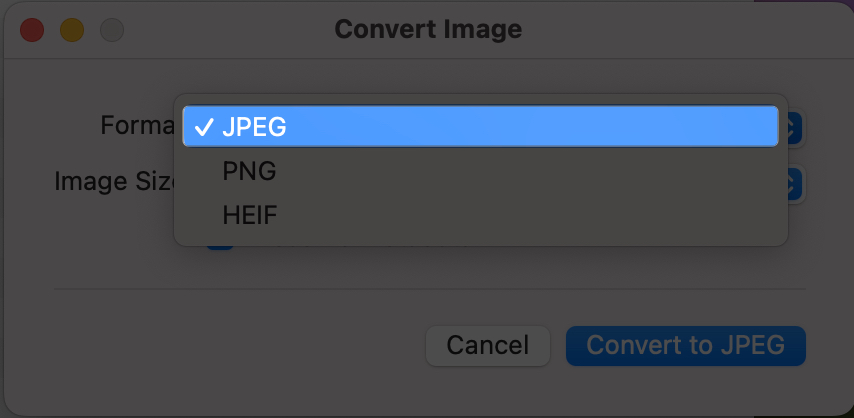
- From the pop-up that appears, select Quick Actions → Convert Image.
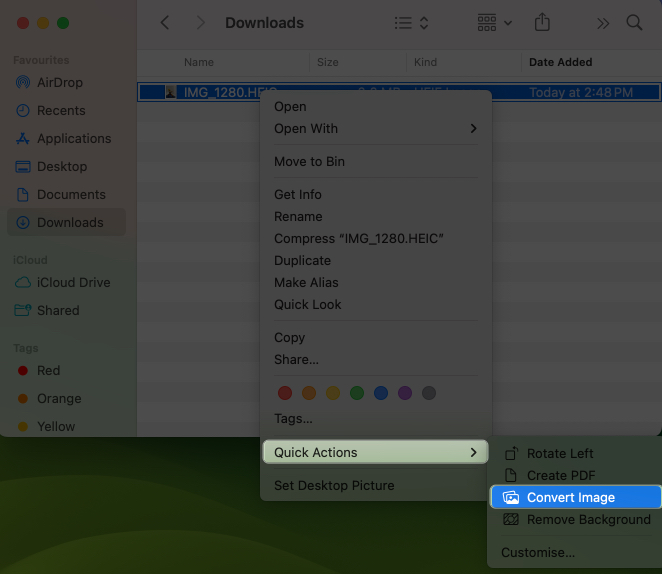
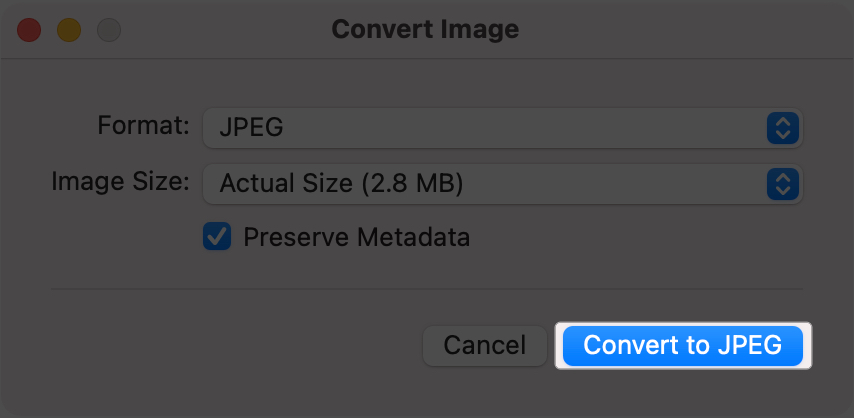
- Next, click the drop-down menu next to Format → Select JPEG.
- After that, click on the Convert to JPEG button.
This will create a duplicate of the selected image in JPG format.
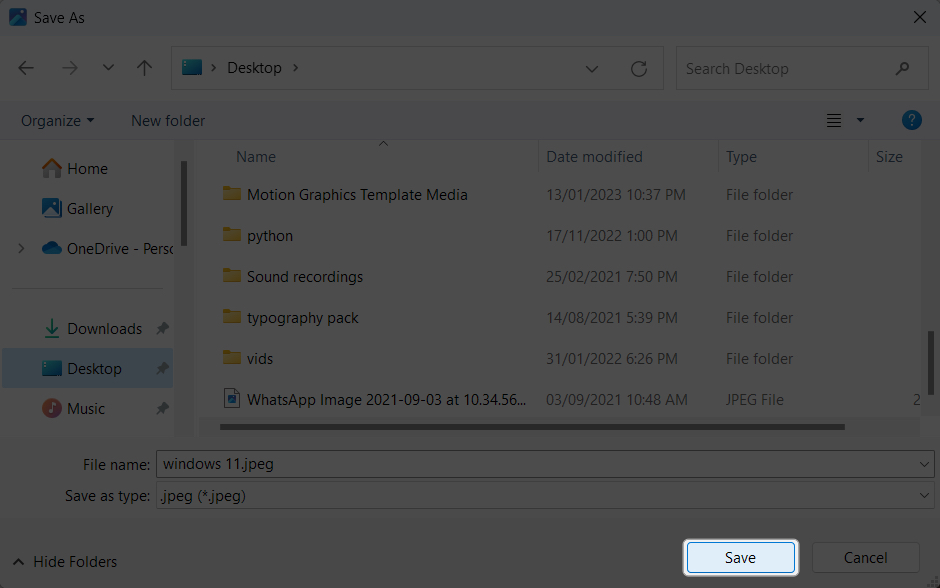
How to convert HEIC to JPG on Windows 11
Now that you know how to convert HEIC to JPG on a Mac, it’s important to know how to do the same on Windows if you don’t own a Mac.
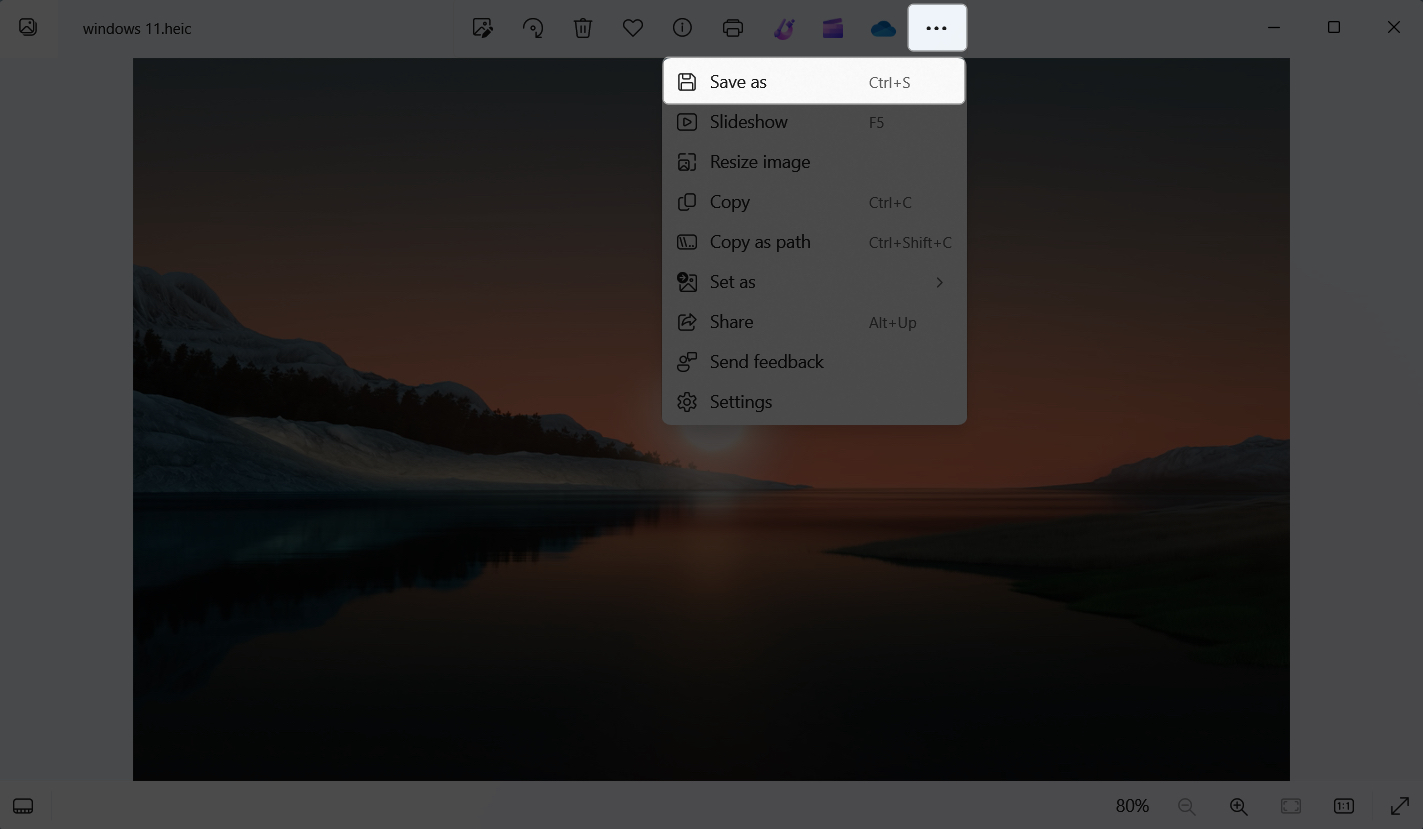
- Open the HEIC image you want to convert to JPEG using a supported photo app.
- Next, click the Three Dots button at the top center and choose Save As.
- Click the drop-down button next to Save File as field and select JPEG.
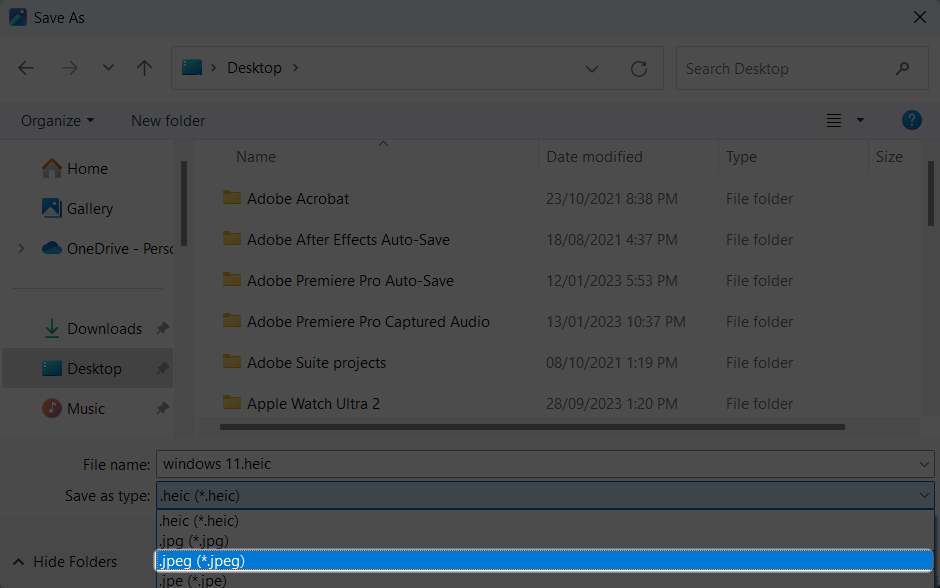
- Finally, click on the Save button.
Conclusion
And that’s it; this is all you need to know about how to convert HEIC photos to JPG on iPhone, iPad, Mac or Windows PC. Remember that keeping the Camera app format to High Efficiency is the best option to save space on your iPhone without compromising the image quality.
Still left with some doubts or queries? Comment below, and I’ll be happy to respond.
Read more:
- How to convert picture to PDF on iPhone and iPad
- How to batch edit photos on iPhone, iPad, and Mac
- How to convert WebP images to JPG or PNG on Mac
🗣️ Our site is supported by our readers like you. When you purchase through our links, we earn a small commission. Read Disclaimer.